Well I haven't managed to make much recently. I have been practicing crochet including making a little hat to form a pattern; I will be making more for Lisa's stars when I have spare time.
In preparation for going away soon I have been trying to choose a project for the evenings, and have decided to start on my Christmas presents! I am starting with making my Mother-in-law a blanket following this tutorial. Hopefully the yarn I ordered arrives in time.
Tuesday 26 July 2011
Monday 18 July 2011
Travel drawing pad
Well, we are heading off to the Lakes in a few weeks time and C is not a happy traveller, and with the prospect of 6+ hours driving I turned my thoughts to ways to entertain her. She has recently developed a love of drawing so I thought I would make her a handy pad that is reinforced enough for her to write on her lap, and somewhere to store the pencils, and this is what I ended up with.


It was fairly simple to make - especially if you have made a crayon/pencil roll before. The seam allowance is 1/2", and it is made with my possible leftie daughter in mind, so switch the sides for a rightie.
I used 2 different fabrics - a patterned and a plain. The pieces required are:
9.75" x 13.25" plain fabric
10.5" x 13.25" plain fabric
10.5" x 10" patterned fabric
19.5" x 13.25" patterened fabric
5" x 3" plain fabric

Take the smallest patterned piece (10.5x10) in potrait form, fold in half and pin to the bottom of the largest plain piece (10.5x13.25) in potrait format. If you have made a crayon/pencil roll before follow that method. Mark up the patterned piece every 7/8" (for a pencil) and stitch this making sure to reinforce the top edge. I also added an applique on this piece. To finish off turn the 1/2" seam allowance on the left hand side and stitch along the whole length.

To make the closing tab fold the smallest piece in half and stitch along the long edge and one short edge, turn right side out and top stitch all the closed edges.

Now to assemble all the pieces:
My closing tab is affixed using a snap, but you could easily use velcro, ribbon or a button, simply match up where the tab will close on the biggest patterned piece and, in this case, fix snaps to both parts. Folding the patterned piece in half as it would close, turning the fabric where the 1/2" seam allowance would be, place the closing tab in the correct position and pin.
Take two short pieces of elastic and pin across the outer corners of the good side of the patterned piece (on the right hand side of mine) and take the unaltered plain piece and pin this good side down to the right hand side on top of the elastic, turning the seam allowance and pinning.

Place the piece for the pencils and place right side down on the left hand side and pin.
Now stitch all the way around.
Turn right side out.
Cut down card/plastic to fit in the pocket created under the unadorned plain fabric, I used a piece of cardboard from an old box topped with a piece of smooth plastic I had kicking around the house to give a nice writing surface.

You can now stitch the pocket closed - if you use a zipper foot you can get close in to the card and this will hold it in tight.
The pocket under the pencil side can be stitched shut or left open - I have left it open as somewhere to keep paper.
And there you have the finished product.


It was fairly simple to make - especially if you have made a crayon/pencil roll before. The seam allowance is 1/2", and it is made with my possible leftie daughter in mind, so switch the sides for a rightie.
I used 2 different fabrics - a patterned and a plain. The pieces required are:
9.75" x 13.25" plain fabric
10.5" x 13.25" plain fabric
10.5" x 10" patterned fabric
19.5" x 13.25" patterened fabric
5" x 3" plain fabric

Take the smallest patterned piece (10.5x10) in potrait form, fold in half and pin to the bottom of the largest plain piece (10.5x13.25) in potrait format. If you have made a crayon/pencil roll before follow that method. Mark up the patterned piece every 7/8" (for a pencil) and stitch this making sure to reinforce the top edge. I also added an applique on this piece. To finish off turn the 1/2" seam allowance on the left hand side and stitch along the whole length.

To make the closing tab fold the smallest piece in half and stitch along the long edge and one short edge, turn right side out and top stitch all the closed edges.

Now to assemble all the pieces:
My closing tab is affixed using a snap, but you could easily use velcro, ribbon or a button, simply match up where the tab will close on the biggest patterned piece and, in this case, fix snaps to both parts. Folding the patterned piece in half as it would close, turning the fabric where the 1/2" seam allowance would be, place the closing tab in the correct position and pin.
Take two short pieces of elastic and pin across the outer corners of the good side of the patterned piece (on the right hand side of mine) and take the unaltered plain piece and pin this good side down to the right hand side on top of the elastic, turning the seam allowance and pinning.

Place the piece for the pencils and place right side down on the left hand side and pin.
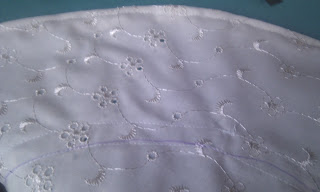
 |
| Where the two pieces of plain fabric join - note how the seam allowance on the RH piece is pinned back |
Now stitch all the way around.
Turn right side out.
Cut down card/plastic to fit in the pocket created under the unadorned plain fabric, I used a piece of cardboard from an old box topped with a piece of smooth plastic I had kicking around the house to give a nice writing surface.

You can now stitch the pocket closed - if you use a zipper foot you can get close in to the card and this will hold it in tight.
The pocket under the pencil side can be stitched shut or left open - I have left it open as somewhere to keep paper.
And there you have the finished product.

Tuesday 12 July 2011
Bucket hat
Well I found a use for one of the fabrics; I made a new bucket hat for C from the strawberries fabric and here it is.

 Made following this tutorial, which I love.


Friday 8 July 2011
New fabric
Had a lovely delivery this morning of some new fabric - now I need to decide what to do with it!
 |
| Strawberries, Ann Kelle for Robert Kaufman |
 |
| Phoebe flowers - In the Beginning |
 |
| Pretty Bird Dancing, Pillow and Maxfield for Michael Miller |
 | |
| Garden on white, Riley Blake |
 |
| Cool cords Butterfly kiwi green, Robert Kaufman |
 |
| Blue Sugar and Spice, Riley Blake |
 |
| Bloom and Grow flower, Riley Blake |
Wednesday 6 July 2011
Simple sun hat
Well my daughters bucket hat - made following this fab tutorial - got lost the other day so I needed to whip up a hat for the next day (yay to the summer sun!) and this is what I came up with.

Firstly the measurements.

Cut out 2 circles of fabric (plus interfacing the size of the brim if you want it a bit stiff)
(After adding interfacing to back side)
Put good sides together and sew round the edge of your circles leaving a 3" gap for turning.
Turn right side out and top stitch over opening and around entire hat.

Taking the measurement for the depth of the hat mark another circle on the underside of the hat.
Sew along this mark, sew another circle about 0.5" further out (depending on the width of your elastic).
Cut a small hole in the channel between the stitches on the wrong side only.
Cut elastic to desired length (remembering excess overlap for joining) and thread through the channel.
Join ends of elastic and hand stitch hole closed.

There you have a quick simple summer hat.

Firstly the measurements.
- Measure from ear to ear (or however deep you want the hat)
- Divide this by 2
- Decide how big you want the brim
- Add seam allowance (0.5")

Cut out 2 circles of fabric (plus interfacing the size of the brim if you want it a bit stiff)
(After adding interfacing to back side)
Put good sides together and sew round the edge of your circles leaving a 3" gap for turning.
Turn right side out and top stitch over opening and around entire hat.

Taking the measurement for the depth of the hat mark another circle on the underside of the hat.
Sew along this mark, sew another circle about 0.5" further out (depending on the width of your elastic).

Cut a small hole in the channel between the stitches on the wrong side only.
Cut elastic to desired length (remembering excess overlap for joining) and thread through the channel.
Join ends of elastic and hand stitch hole closed.

There you have a quick simple summer hat.
Subscribe to:
Posts (Atom)